I should note before beginning that if you sell the stock exhaust, carburetor and air box, you can actually do all of the following for no cost and still pocket proceeds.
Step 1 – Remove cylinder jug from engine. Replace the base gasket with the following spacer sandwich – one base gasket – one MLM 1mm metal spacer – another base gasket. The spacer and the extra base gasket will move the cylinder forward 1.5mm. This is necessary so that the piston will completely open up the exhaust port at Bottom Dead Center (BDC – where piston is at its lowest point in the stroke). In stock form, the piston partially blocks the exhaust ports as well as all other ports. The remaining ports will still be partially blocked but less than they were originally were.
Step 2 – With the piston still connected, temporarily install the base gasket followed by the metal spacer and then followed by the second base gasket. Finally install the cylinder jug. You will also want to fasten the cylinder in place. If you are using cylinder bolts or cylinder studs, you can use old wrists pins as spacers on the bolts/studs. You want to fasten the cylinder jug in place without using the cylinder head. See picture. Now use the kick start lever or turn the flywheel so that the piston comes to top dead center (TDC). With the metal spacer installed, the piston will not come to the end of the cylinder jug as it should. Measure how far the piston is from the end of the cylinder.
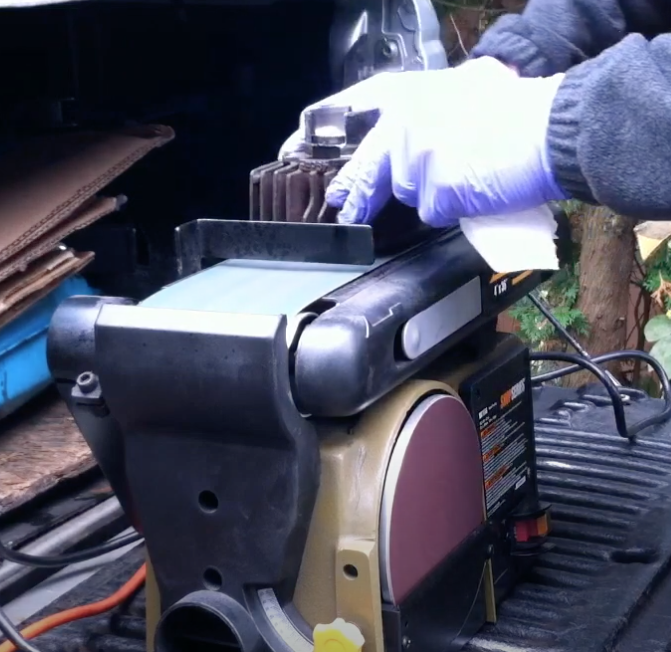
A “machinist” objected to my use of a belt sander without really specifying why, other than he found it offensive. I used to send out cylinders for this sort of work to a machinist. After that I hand-sanded my own cylinder (which I don’t recommend because it takes an incredible amount of work to remove 1.5mm of material). After that experience, I bought a belt sander and found that I could remove material and achieve a level surface without hand sanding. Maybe I’m more skilled than the average machinist but I think that if I achieved it, anyone else could. As long as your sanding belt is wider than the surface to be sanded, you will be fine. Just slowly rotate the cylinder on the belt while it is sanding and keep even pressure. If your final product is slightly off, you can hand sand it by taping sand paper to a piece of glass and sanding in a figure eight pattern.
There’s no need to pay a machinist to perform this relatively simple task. And there’s no need to buy expensive machinist equipment to accomplish removing material from the top of the cylinder. I would think that a machinist’s skills, equipment, and expense would be better reserved for more complex tasks like making different gearing for the Express.
Step 3 – Now you know how much metal you need to remove from the top of the cylinder jug in order to get the piston back to the end of the cylinder at TDC. I use a belt sander with a 4″ wide 80 grit metal grinding belt to remove metal from the cylinder. I try to apply even pressure on the cylinder jug while it is on the sanding belt, and I rotate the cylinder as it is sanding in order to try to keep the sanding even. After about 15-20 minutes, you may want to clean off all the metal dust from the cylinder jug and test fit it again to see how much more you need to remove (wear a mask to prevent inhaling the metal dust and wear eye protection and protective clothing to keep the dust out of your eyes and off your skin).
Caution: do not remove so much material that the piston hits the cylinder head.
Step 4 – Once you have removed all the material, clean the cylinder jug to rid it of all metal sanding dust. I use white paper towels and WD-40. Wipe out the cylinder bore and the ports until the paper towel comes out completely white. I also stuff pieces of paper towels into the ports and push them through the ports with chopsticks to make sure the ports are clean. Any metal dust left behind will wear your cylinder, piston and rings considerably faster.

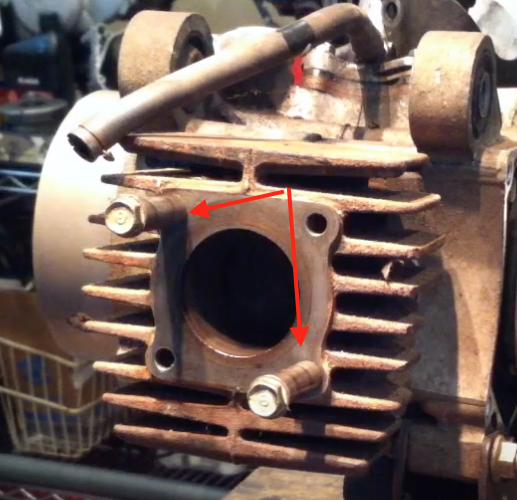
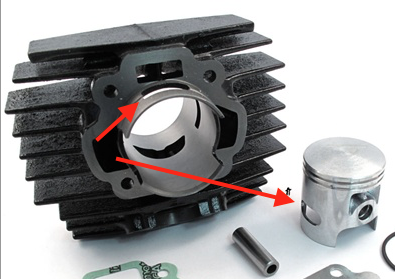
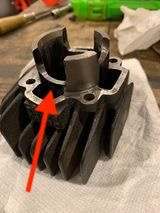
Step 5 – Once you are happy with the first stage, stage 2 involves raising the exhaust port about 2mm. I’ve tried to designate with the arrow above the front of the exhaust port. You are going to take a dremel and remove material so that that edge is 2mm closer to the top of the cylinder. I use the following tools on my dremel to remove metal: 1) Carbide Burr 1/8″ shank shape D; 2) 3 inch length Burr 1/8″ shank shape D; 3) CeramCut Blue Stone CB R Sanding tool; 4) fine grit sandpaper wrapped around chopstick to finish up sanding. I get these tools off CC Specialty Tool Store online.
Step 5 continued – I only remove material in the exhaust port from the cylinder walls down to about 1/4″ into the exhaust port. I no longer remove material throughout the entire exhaust port. By keeping the rest of the exhaust port as original, you maintain much of the velocity of the gasses passing through the port. To keep track of how far you have raised the exhaust port, measure from the top of the cylinder to the exhaust port before starting and then measure several times as you are removing material.
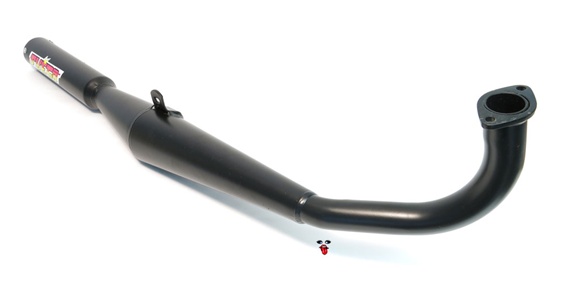
Now to the next stage as we have finished with the cylinder. This stage involves adapting a Tomos A35 exhaust to work with a honda express exhaust header. The Tomos exhausts are particular attractive because they are meant to be mounted along the right side of the bike (like the Honda stock exhaust) and they are cheap. I’ve used the Tecno Boss as well as the Biturbo and the Estoril pipes. I may try others in the future. I take you through the process in the following video.
Final Stage – You will want to upgrade the carburetor. To keep costs down, I like to use a Dellorto SHA clone carb. You will also need an intake adapter. I haven’t yet found a cheaper substitute for the MLM nc50 SHA intake adapter ($40) but am still looking. Nevertheless, you’ve still only spent ~$10 for the metal spacer and base gaskets, ~$40 for the mlm intake adapter, ~$20 for an SHA clone carb, and ~$60 for the pipe. Maybe you need a different size SHA jet for a couple more bucks. These changes should get you in the high 30’s on an Express nc50. It did for me!
Cons – You will definitely lose low end (acceleration from a stop or near stop) with these modifications. You can combat this by raising compression (usually by taking off more material from the cylinder head or cylinder jug or both), making the clutch lighter or other clutch mods, or gearing down through a shorter rear tire.
Alternative method suggested by a machinist – Cut the muffler clean in half right between the shield screws. Remove everything inside. Use one of the larger tubes you removed to weld in place of the tiny outlet. Weld it back together. Open up exhaust port same size as exhaust tube without changing dimensions of cylinder opening. Put it back on. Drill main jet one size larger and leave air filter off or a KN filter. This will result in a 33-35 mph top speed. Done it more times than I can count. Almost free.
While this approach will provide minimal gains (maybe a few mph at best), it ignores several two stroke fundamentals and/or reflects a limited understanding of them. First, why do all this work when a better result can be obtained by simply selling your stock exhaust, carburetor and air box and replacing them with an MLM next level pipe (with larger diameter header), an inexpensive but effective carburetor with larger venturi and a free flowing air filter. You could make money on your stock parts even after buying the new parts. And you could achieve better performance.
Second, two stroke performance lies in the engine and the exhaust working together to create more power. The stock exhaust can never achieve this as its sole function is to reduce noise. It never works in resonance with the engine to create more power. A performance exhaust, however, does exactly this because at a certain rpm range, it packs additional fuel charge into the engine which increases power.
The other two stroke fundamental (especially in this application of mopeds/nopeds if you are looking to unleash power) is to remove as many of the bottlenecks that the manufacturer included as possible. Simply making the exhaust more free flowing by disemboweling it only addresses one small bottleneck. The extremely narrow exhaust header, the narrow stock carburetor venturi, the restrictive air box, partially blocked exhaust and intake ports, and the small exhaust port still exist. These several bottlenecks will still limit performance. My solution eliminate several of these.